Your computer is probably one of the most important pieces of technology in your home, so you need to keep it in good condition. A little proper maintenance every once in a while can help you get the most out of your computer, not just today, but for many years to come. But where to start? Here we share some quick tips to take care of your computer. While it’s impossible to cover this topic from every perspective, you can think of our guide as an introduction to help you decide where to start. Whether you want to clean up your desktop physically or clean up Windows digitally, here are some tips to get you started.
How to clean your computer and peripherals
Windows computers, especially desktop computers, come in all shapes and sizes, but the tips we’ll cover here will help you clean up your computer, whether you’re pre-built or putting it together yourself. If you have a laptop, take a look Our Mac organization guide. All the steps we detailed there will work for portable Windows as well.
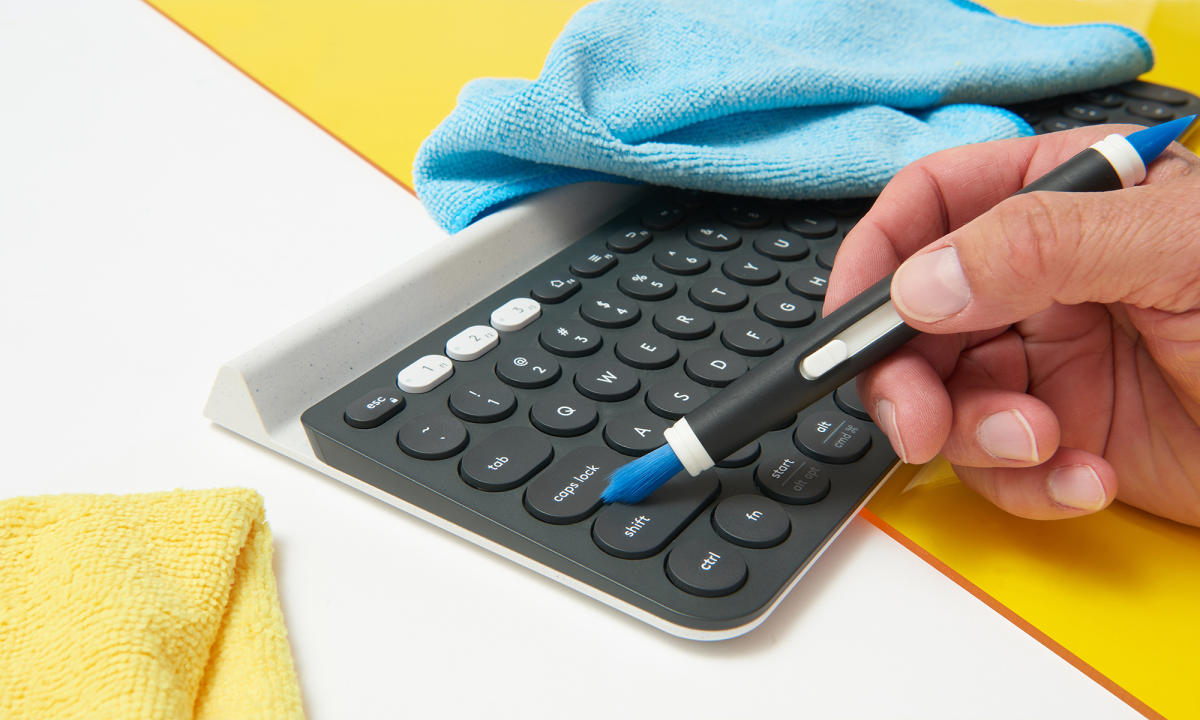
Before cleaning the inside of your computer, start with your screen and peripherals. All you need at this stage is some distilled water in a spray bottle and a microfiber cloth. You can buy the first one at a grocery store or make it yourself. If you don’t already own a microfiber cloth, Amazon does 24 packs at an affordable price You can get it for under $15. Once you have it in hand, spray the water on a clean cloth and wipe down your computer screen before moving on to the mouse and keyboard. You want to start with your screen so you don’t transfer dirt and residue to the panel.
When you’re done, turn off your computer and disconnect everything connected to it. You’ll also want to turn off the power supply unit (PSU) by turning the switch on the side to the “O” position. Next, press and hold the power button for about 30 seconds to discharge the capacitors. To protect your computer from static electricity, we recommend that you buy antistatic wrist strap.
If possible, do most of the steps we’ll describe outside. The last thing you want to do is go through the trouble of cleaning your computer and then let it inhale all the dust again.
After moving your computer, start by removing the side panels. Most modern cases allow you to do this without any tools, but for most of the jobs we’ll detail in a moment, you’ll need at least a screwdriver. When it comes to most of the screws on your computer, a 4-inch Phillips screwdriver should be all you need. Some components like the GPU are Torx screws etc. maybe, but don’t worry about them for now, because we won’t separate them. If you don’t already have a decent screwdriver set and you have a DIY streak, the driver kit from iFixit is your best bet. The 16, 32 and 64-bit suites this sale is a great starting point, and they’ll come in handy for more than just your computer.
If your computer has any dust filters, remove them and wash them before setting them aside to dry. Depending on how long your computer has been gathering dust, you may want to remove some components, such as the GPU, to make cleaning things easier.
If this is something you feel comfortable with and it’s the first time you’ve removed any of the internals, use your phone to take pictures of the internals. The pictures will help you put all the parts in their original place at the end. It is important to do this because there is an optimal way to install many components on your computer. For example, you always want to install the GPU on the fastest available PCIe lane. When it comes to removing any PCI card, first open its mounting bracket and then push the corresponding release on your motherboard before removing the card.
Even if you decide to keep all of your computer’s internals in place, you’ll need something to blow away all that dust. A can of compressed air is an option, but I like to use a Giottos rocket launcher. It is designed to clean camera sensors and will not harm any of your components. This is also a one-time purchase.
Use whatever you have on hand to blow dust from your computer’s internal components, fans, and grills. Pay special attention to the coolers connected to the PC’s CPU, GPU, chipset and voltage regulators. They will likely have the hardest job of dusting your system due to their dense fin stacks. Moreover, particularly bad stacking can make them ineffective at cooling those components, which in turn will affect their performance.
Use an antistatic brush when cleaning any exposed PCBs (Like this one from Amazon) instead of microfiber cloth. You will avoid damaging any of the sensitive components on the board. You can go over any non-electronic part with a dampened microfiber cloth.
At this point, all you need to do is put everything in its place. As a final tip, if there’s any way you can keep your desk off the floor, you’ll spend less time cleaning it because it won’t be near all the dust and lint that collects there. If your desk setup or living space doesn’t make it an option, a PC tower stand it’s an inexpensive but effective way to get your computer off the floor and help it attract less trash.
How to organize your computer’s memory drives
If it’s been a while since you’ve checked all the software you’ve installed on your computer, the best place to start is Task Manager. Here you can see how much of your computer’s resources are spent on specific processes. Because everyone will have different software installed on their computer, it’s hard to give general recommendations, but by using Task Manager, you can figure out which programs are slowing down your computer. For most people, there will be two main culprits: bloatware and antivirus software.
If you bought your computer from a system integrator like Dell, it will likely include software that your computer doesn’t need to run. You can safely remove unused, preloaded apps to improve performance and save space.
This next tip may be controversial to some: I believe that as long as you avoid clicking on shady links and stay away from the dark corners of the web, the Microsoft Defender tool built into Windows Security is all you need to protect your computer. most of the malware out there. Although there are good antivirus programs like Bitdefender and Malware bytes, most of them cost too much for what they offer and will only slow down your computer. If you don’t feel comfortable uninstalling the antivirus program, leave it on your computer.
While you’re in task manager, you’ll also want to click on the “Startup programs” tab to see what programs start up when you start your computer. You can speed up this process by limiting this list to as few applications as possible. As for the actual process of removing any software you don’t need, always uninstall programs from the Control Panel, as this will leave the least amount of residue when all is said and done. If you’ve been using Windows for a while, you’ll have error files all over the place. It is possible to cut them by hand, but it can take a long time to do so. Thankfully, Windows’ built-in Disk Cleanup utility will help you fix these problems with ease.
If you have old mechanical drives installed on your computer, it’s a good idea to get into the habit of defragging them regularly. First, launch the installed Merge and Optimize Disks application and click the “Optimize” button. Depending on the size of your hard drive, this process may take some time. Do not defragment your SSDs as you will shorten their lifespan for little or no performance improvement.
How to organize your apps, icons, and other windows
Say what you will about Windows 11 (or 10), but the fact remains that it comes with some of the best window management tools built right into the operating system. You don’t need to download any additional software to organize your desktop, but there are some settings you can tweak to get the most out of its signature. Snap functionality.
As you already know, you can press the Windows and Tab keys at the same time to open the Task View panel. Here you can add additional virtual desktops. If you’re not using virtual desktops anymore, they’re great for organizing your active windows so you don’t have to constantly rearrange them when you’re trying to find a specific one. You can quickly press the Windows key, Ctrl, or the left or right arrow keys to move between desktops. But to make things even simpler, go to the Settings app and the Multitasking section of the System menu. Under the “Desktops” heading, change both settings to “On all desktops”. You can now use the Alt-Tab shortcut or the taskbar to jump to any program on any desktop.
When it comes to arguing with your icons, a lot of it will depend on the browser you’re using. We have comprehensive guide Select the organization tab if you want to drill down into the available tools with the most popular options. But as a basic starting point, all major players include a feature that allows you to close tabs. I use it to keep the websites I visit most during the workday (in my case Gmail, Trello, and Google Drive) always open and at the top of my tab bar. That way, these tabs are never lost among the countless websites I open for a story I’m writing. Plus, in the case of Brave, I can use a handful of the browser I use keyboard shortcuts to quickly jump to these tabs.
Finally, we want to highlight how much customization Windows offers you when it comes to organizing your computer. As just one example, you can right-click items located on the taskbar and start menu putting your frequently used apps and shortcuts where you can easily access them. However, if you really want to learn all the options that Windows has to offer on this front, it likes websites Windows Center there is detailed methods this is a great starting point.
Jeff Dunn contributed to this report.
This article contains affiliate links; we may earn a commission if you click on such a link and make a purchase.